How to Install a Bidet

Bidets help improve personal hygiene and offer a variety of health benefits. Once your new bidet has arrived at your home – how do you install it? Bidet toilets, bidet seats, and bidet attachments all require different installation techniques. Here’s what you need to know!
Installing a Bidet Toilet
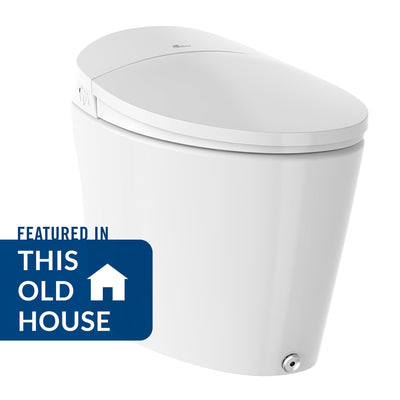
Bidet toilets completely replace your current toilet. They need to be connected to your home’s water supply and sewer system to flush waste. They also require being plugged into a 120v outlet to operate. If you’re at all handy, you can likely remove your existing toilet and install your new bidet toilet. If you’re not mechanically inclined, we recommend hiring a licensed plumber or finding someone who knows their way around a wax ring.
Check out the Discovery DLX Smart Bidet Toilet, one of our most popular bidet toilets.
Installing a Bidet Seat
Bidet seats are simple to install but require being connected to your home’s water supply and access to a 120v electrical outlet. Bidet seats are mounted directly to your toilet – replacing your current toilet seat.
We recommend referring to your owner’s manual for model-specific installation instructions. Basic instructions include:
- Start your installation by turning off the water supply at the toilet.
- Remove the existing toilet seat. You may need to use a flathead screwdriver.
- Attach the water hoses to your water supply using the provided T-adapter. To avoid leaks, make sure not to overtighten the hose connections. Do not attach the hose to the bidet seat until the seat has been mounted to the toilet.
- Attach the catch plate to toilet by placing the plate and guides over each mounting hole. Insert mounting bolts through the plate and mounting holes.
- Slide the bidet seat onto the catch plate. You’ll hear a click once the seat is securely attached to the catch plate. The bidet seat will feel a little loose on the toilet bowl. Adjust the fit from front to back and side to side for balance. Secure mounting bolts with nuts. Tighten the nuts on both bolts securely.
- Attach the water supply hose to your bidet seat. Check for any water leaks before plugging in the power cord.
- If there are no leaks, plug the power cord into a grounded, 120v (standard outlet voltage) electrical outlet.
- After completing your installation, slowly turn the water supply valve back on. If there are no leaks after about five minutes, you’re ready to start using your bidet attachment!
Installing a Bidet Attachment
Bidet toilet attachments are extremely easy to install in a matter of minutes – no plumber needed. They don’t require electricity and mount directly to your toilet, below the seat. Each of our models comes with step-by-step installation instructions that are specifically made for that product.
Bidet attachments like the SlimEdge are designed for easy DIY installs, but it’s important to follow the instructions in the manual.
- Start your installation by turning off the water supply at the toilet.
- You will likely need a flathead screwdriver to remove the existing toilet seat, but attaching the water hoses to the bidet and to your water supply is done by hand.
- Most bidet attachments are installed right underneath the seat, with the same bolts and nuts securing both to the toilet.
- Make sure not to overtighten the hose connections. Use your hands instead of a wrench to tighten all hose connections to prevent leaks.
- After completing your installation, slowly turn the water supply valve back on. If there are no leaks after about five minutes, you’re ready to start using your bidet attachment!
We also have videos on YouTube that walk you through the installation process for a variety of our bidet seats and attachments.
Have Questions About Bidet Installation?
If you have questions about a bidet, you can email us at support@biobidet.com and get in touch with a Bio Bidet professional.
Don't miss any giveaway opportunities and follow us on social media! We’re on Facebook, Instagram and Twitter.
Interested in receiving exclusive discounts and being the first to hear about sales and new product launches? Sign up for our newsletter!


